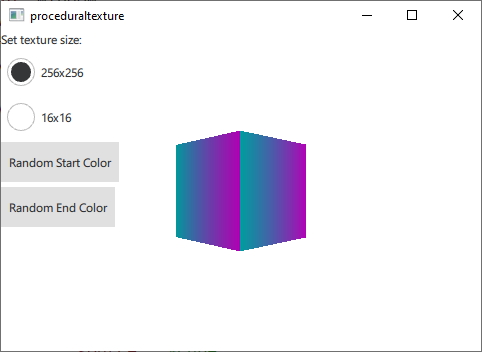
演示如何从 C++ 提供自定义纹理数据。

This example makes use of QQuick3DTextureData and the textureData property of Texture to provide texture data generated from C++ instead of loading it from a static asset.
First we define a C++ class for our texture data. We make it a subclass of QQuick3DTextureData . This is not stricly necessary, since there are no virtual functions, but it is much more convenient to have everything in one class. We define the properties we are going to use, and add QML_NAMED_ELEMENT to make it available from QML:
class GradientTexture : public QQuick3DTextureData
{
    Q_OBJECT
    Q_PROPERTY(int height READ height WRITE setHeight NOTIFY heightChanged)
    Q_PROPERTY(int width READ width WRITE setWidth NOTIFY widthChanged)
    Q_PROPERTY(QColor startColor READ startColor WRITE setStartColor NOTIFY startColorChanged)
    Q_PROPERTY(QColor endColor READ endColor WRITE setEndColor NOTIFY endColorChanged)
    QML_NAMED_ELEMENT(GradientTexture)
    ...
We add a function to update the texture. It uses QQuick3DTextureData::setSize ,和 QQuick3DTextureData::setFormat to configure the texture, and QQuick3DTextureData::setTextureData to set the image data:
void GradientTexture::updateTexture()
{
    setSize(QSize(m_width, m_height));
    setFormat(QQuick3DTextureData::RGBA8);
    setHasTransparency(false);
    setTextureData(generateTexture());
}
函数
generateTexture
创建
QByteArray
of the correct size, and fills it with image data:
QByteArray GradientTexture::generateTexture()
{
    QByteArray imageData;
    // Create a horizontal gradient between startColor and endColor
    // Create a single scanline and reuse that data for each
    QByteArray gradientScanline;
    gradientScanline.resize(m_width * 4); // RGBA8
    for (int x = 0; x < m_width; ++x) {
        QColor color = linearInterpolate(m_startColor, m_endColor, x / float(m_width));
        int offset = x * 4;
        gradientScanline.data()[offset + 0] = char(color.red());
        gradientScanline.data()[offset + 1] = char(color.green());
        gradientScanline.data()[offset + 2] = char(color.blue());
        gradientScanline.data()[offset + 3] = char(255);
    }
    for (int y = 0; y < m_height; ++y)
        imageData += gradientScanline;
    return imageData;
}
调用
updateTexture
each time a property is changed:
void GradientTexture::setStartColor(QColor startColor)
{
    if (m_startColor == startColor)
        return;
    m_startColor = startColor;
    emit startColorChanged(m_startColor);
    updateTexture();
}
Finally, we can use our new texture from QML:
Model {
    source: "#Cube"
    materials: DefaultMaterial {
        diffuseMap: Texture {
            textureData: GradientTexture {
                id: gradientTexture
                startColor: "#00dbde"
                endColor: "#fc00ff"
                width: size256.checked ? 256 : 16
                height: width
            }
            minFilter: size256.checked ? Texture.Linear : Texture.Nearest
            magFilter: size256.checked ? Texture.Linear : Texture.Nearest
        }
    }
文件: