A Qt Quick app designed for portrait devices that uses custom components, animated with AnimationController , and JavaScript for the application logic.
Calqlatr demonstrates various QML and Qt Quick features, such as displaying custom components and using animation to move the components around in the application view. The application logic is implemented in JavaScript and the appearance is implemented in QML.
要运行范例从 Qt Creator ,打开 Welcome 模式,然后选择范例从 Examples 。更多信息,拜访 构建和运行范例 .
In the Calqlatr application, we use the following custom types that are each defined in a separate .qml file:
To use the custom types, we add an import statement to the main QML file, calqlatr.qml that imports the folder called
content
where the types are located:
import "content"
We can then display custom components by adding the component types to any QML file. For example, we use the NumberPad type in calqlatr.qml to create the number pad of the calculator. We place the type inside an Item QML type, which is the base type for all visual items in Qt Quick:
    Item {
        id: pad
        width: 180
        NumberPad {
            id: numPad
            y: 10
            anchors.horizontalCenter: pad.horizontalCenter
            display: display
        }
    }
Further, we use the CalculatorButton type in the
NumberPad
type to create the calculator buttons.
CalculatorButton.qml
specifies the basic properties for a button that we can modify for each button instance in
NumberPad.qml
. For the digit and separator buttons, we additionally specify the
text
特性。
For the operator buttons, we also specify another color (green) using the property alias
color
and set the operator property to
true
. We use the operator property in functions that perform the calculations.
We place the buttons inside a Grid QML type to position them in a grid:
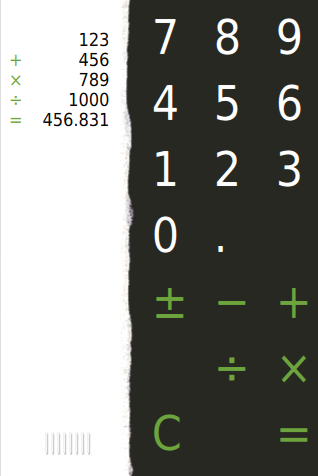
Grid {
    id: root
    columns: 3
    columnSpacing: 2
    rowSpacing: 2
    required property Display display
    function updateDimmed() {
        for (let i = 0; i < children.length; i++) {
            children[i].dimmed = CalcEngine.isOperationDisabled(children[i].text)
        }
    }
    component DigitButton: CalculatorButton {
        onPressed: function() {
            CalcEngine.digitPressed(text, root.display)
            root.updateDimmed()
        }
    }
    component OperatorButton: CalculatorButton {
        onPressed: function() {
            CalcEngine.operatorPressed(text, root.display)
            root.updateDimmed()
        }
        textColor: "#6da43d"
        dimmable: true
    }
    Component.onCompleted: updateDimmed()
    DigitButton {
        text: "7"
    }
    DigitButton {
        text: "8"
    }
    DigitButton {
        text: "9"
    }
    DigitButton {
        text: "4"
    }
    DigitButton {
        text: "5"
    }
    DigitButton {
        text: "6"
    }
    DigitButton {
        text: "1"
    }
    DigitButton {
        text: "2"
    }
    DigitButton {
        text: "3"
    }
    DigitButton {
        text: "0"
    }
    DigitButton {
        text: "."
        dimmable: true
    }
    DigitButton {
        text: " "
    }
    OperatorButton {
        text: "±"
    }
    OperatorButton {
        text: "−"
    }
    OperatorButton {
        text: "+"
    }
    OperatorButton {
        text: "√"
    }
    OperatorButton {
        text: "÷"
    }
    OperatorButton {
        text: "×"
    }
    OperatorButton {
        text: "C"
    }
    OperatorButton {
        text: " "
    }
    OperatorButton {
        text: "="
    }
}
Some of the buttons also have a
dimmable
property set, meaning that they can be visually disabled (dimmed) whenever the calculator engine does not accept input from that button. As an example, the button for square root operator is dimmed for negative values.
We use the Display type to display calculations. In Display.qml, we use images to make the display component look like a slip of paper that contains a grip. Users can drag the grip to move the display from left to right.
When users release the grip, the
AnimationController
QML type that we define in the calqlatr.qml file finishes running the controlled animation in either a forwards or a backwards direction. To run the animation, we call either completeToEnd() or completeToBeginning(), depending on the direction. We do this in the
MouseArea
's
onReleased
signal handler, where
controller
is the id of our
AnimationController
:
        MouseArea {
            ...
            onReleased: {
                if (rewind)
                    controller.completeToBeginning()
                else
                    controller.completeToEnd()
            }
        }
Unlike other QML animation types,
AnimationController
is not driven by internal timers but by explicitly setting its progress property to a value between
0.0
and
1.0
.
Inside the AnimationController , we run two NumberAnimation instances in parallel to move the number pad and the display components simultaneously to the opposite sides of the view. In addition, we run a SequentialAnimation instance to scale the number pad during the transition, giving the animation some depth.
    AnimationController {
        id: controller
        animation: ParallelAnimation {
            NumberAnimation {
                target: display
                property: "x"
                duration: 400
                from: -16
                to: window.width - display.width
                easing.type: Easing.InOutQuad
            }
            NumberAnimation {
                target: pad
                property: "x"
                duration: 400
                from: window.width - pad.width
                to: 0
                easing.type: Easing.InOutQuad
            }
            SequentialAnimation {
                NumberAnimation {
                    target: pad
                    property: "scale"
                    duration: 200
                    from: 1
                    to: 0.97
                    easing.type: Easing.InOutQuad
                }
                NumberAnimation {
                    target: pad
                    property: "scale"
                    duration: 200
                    from: 0.97
                    to: 1
                    easing.type: Easing.InOutQuad
                }
            }
        }
    }
We use the easing curve of the type
Easing.InOutQuad
to accelerate the motion until halfway and then decelerate it.
在
CalculatorButton.qml
, the text colors of the number pad buttons are also animated.
        ...
        color: button.dimmable && button.dimmed
            ? Qt.darker(button.textColor)
            : (button.pressed ? Qt.lighter(button.textColor) : button.textColor)
        Behavior on color {
            ColorAnimation {
                duration: 120
                easing.type: Easing.OutElastic
            }
        }
使用
Qt.darker
() to darken the color when the button is dimmed, and
Qt.lighter
() 到
light up
the button when pressed. The latter is done in a separate
state
called
"pressed"
, which activates when the
pressed
property of the button's
MouseArea
有设置。
The color changes are animated by defining a
行为
在
color
特性。
In order to dynamically change the
dimmed
property of all the buttons of the
NumberPad
, we connect its
buttonPressed
信号到
NumberPad
's
updateDimmed()
函数。
    function updateDimmed() {
        for (let i = 0; i < children.length; i++) {
            children[i].dimmed = CalcEngine.isOperationDisabled(children[i].text)
        }
    }
    component DigitButton: CalculatorButton {
        onPressed: function() {
            CalcEngine.digitPressed(text, root.display)
            root.updateDimmed()
        }
    }
    component OperatorButton: CalculatorButton {
        onPressed: function() {
            CalcEngine.operatorPressed(text, root.display)
            root.updateDimmed()
        }
        textColor: "#6da43d"
        dimmable: true
    }
This way, when a button is pressed, all buttons on the
NumPad
receive a
buttonPressed
signal and are activated or deactivated according to the state of the calculator engine.
The calculator.js file defines our calculator engine. It contains variables to store the calculator state, and functions that are called when the user presses the digit and operator buttons. To use the engine, we import calculator.js in the calqlatr.qml file as
CalcEngine
:
import "content/calculator.js" as CalcEngine
默认情况下,
importing a JavaScript file from QML creates a new instance of it
, and any state it contains is unique to that instance. For this example we want the state to be shared amongst all users of the script, so we use
.pragma library
to indicate that:
.pragma library
When users press a digit, the text from the digit appears on the display. When they press an operator, the appropriate calculation is performed, and the result can be displayed using the equals (=) operator. The clear (C) operator resets the calculator engine.
function isOperationDisabled(op) {
    if (digits === "" && !((op >= "0" && op <= "9") || op === "."))
        return true
    else if (op === '=' && previousOperator.length !== 1)
        return true
    else if (op === "." && digits.toString().search(/\./) !== -1) {
        return true
    } else if (op === "√" &&  digits.toString().search(/-/) !== -1) {
        return true
    } else {
        return false
    }
}
function digitPressed(op, display) {
    if (isOperationDisabled(op))
        return
    if (digits.toString().length >= display.maxDigits)
        return
    if (lastOp.toString().length === 1 && ((lastOp >= "0" && lastOp <= "9") || lastOp === ".") ) {
        digits = digits + op.toString()
        display.appendDigit(op.toString())
    } else {
        digits = op
        display.appendDigit(op.toString())
    }
    lastOp = op
}
function operatorPressed(op, display) {
    if (isOperationDisabled(op))
        return
    lastOp = op
    if (op === "±") {
            digits = Number(digits.valueOf() * -1)
            display.setDigit(display.displayNumber(digits))
            return
        }
    if (previousOperator === "+") {
        digits = Number(digits.valueOf()) + Number(curVal.valueOf())
    } else if (previousOperator === "−") {
        digits = Number(curVal.valueOf()) - Number(digits.valueOf())
    } else if (previousOperator === "×") {
        digits = Number(curVal) * Number(digits.valueOf())
    } else if (previousOperator === "÷") {
        digits = Number(curVal) / Number(digits.valueOf())
    }
    if (op === "+" || op === "−" || op === "×" || op === "÷") {
        previousOperator = op
        curVal = digits.valueOf()
        digits = ""
        display.displayOperator(previousOperator)
        return
    }
    if (op === "=") {
        display.newLine("=", digits.valueOf())
    }
另请参阅 QML 应用程序 .