用於觸摸設備的 QML APP 所用的中繼器具有 FolderListModel 以訪問文件夾中的內容,和 PinchHandler 以處理抓取內容時的捏閤手勢。
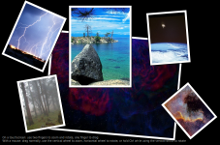
照片錶麵 演示如何使用 Repeater 采用 FolderListModel 和 FolderDialog to access images from a folder selected by a user, and how to handle dragging, rotation and pinch zooming within the same item using Qt Quick 輸入處理程序 .
所有 APP 代碼都包含在一 QML 文件中,
photosurface.qml
. Inline JavaScript code is used to place, rotate, and scale images on the photo surface.
要運行範例從 Qt Creator ,打開 歡迎 模式,然後選擇範例從 範例 。更多信息,見 Qt Creator:教程:構建並運行 .
To create the main window for the Photo Surface app, we use the Window QML type as the root item. It automatically sets up the window for use with Qt Quick graphical types:
Window {
    id: root
    visible: true
    width: 1024; height: 600
    color: "black"
    title: Application.displayName + " : " + folderModel.folder
    property real defaultSize: 200
    property real surfaceViewportRatio: 1.5
    property var imageNameFilters: ["*.png", "*.jpg", "*.gif"] // overridden in main.cpp
使用 Repeater QML 類型同 FolderListModel to display at least the GIF, JPG, and PNG images located in a folder (although main.cpp may expand the list of supported image types):
        Repeater {
            model: FolderListModel {
                id: folderModel
                objectName: "folderModel"
                showDirs: false
                nameFilters: root.imageNameFilters
            }
要使用 FolderListModel 類型,必須 import 它:
import Qt.labs.folderlistmodel
We use a FolderDialog to enable users to select the folder that contains the images:
    FolderDialog {
        id: folderDialog
        title: qsTr("Choose a folder with some images")
        onAccepted: folderModel.folder = selectedFolder
    }
To use the FolderDialog type, we add the following import statement:
import QtQuick.Dialogs
使用
folderDialog.open()
function to open the file dialog when the initial slide show finishes, unless a folder path has been given as a command-line argument:
        Component.onDestruction: {
            folderIcon.visible = true
            const lastArg = Application.arguments.slice(-1)[0]
            const standardPicturesLocations = StandardPaths.standardLocations(StandardPaths.PicturesLocation)
            const hasValidPicturesLocation = standardPicturesLocations.length > 0
            if (hasValidPicturesLocation)
                folderDialog.currentFolder = standardPicturesLocations[0]
            if (/.*hotosurface.*|--+/.test(lastArg)) {
                if (hasValidPicturesLocation)
                    folderModel.folder = standardPicturesLocations[0]
                else
                    folderDialog.open()
            }
Users can also click the folder dialog icon to open it. We use an
圖像
QML type to display the icon. Inside the
圖像
type, we use a
TapHandler
采用
onTapped
signal handler to call the
folderDialog.open()
函數:
    Image {
        id: folderIcon
        visible: false
        anchors.top: parent.top
        anchors.left: parent.left
        anchors.margins: 10
        source: "resources/folder.png"
        TapHandler { onTapped: folderDialog.open() }
        HoverHandler { id: folderMouse }
        ToolTip.visible: folderMouse.hovered
        ToolTip.text: qsTr(`Open an image directory (${openShortcut.nativeText})`)
        ToolTip.delay: 1000
        Shortcut {
            id: openShortcut
            sequence: StandardKey.Open
            onActivated: folderDialog.open()
        }
    }
使用
Rectangle
as a delegate for a
Repeater
to provide a frame for each image that the
FolderListModel
finds in the selected folder. We use JavaScript
Math()
methods to place the frames randomly on the photo surface and to rotate them at random angles, as well as to scale the images. The border color indicates the state of interaction:
            delegate: Rectangle {
                required property date fileModified
                required property string fileName
                required property url fileUrl
                id: photoFrame
                objectName: "frame-" + fileName
                width: image.width * (1 + 0.10 * image.height / image.width)
                height: image.height * 1.10
                scale: root.defaultSize / Math.max(image.sourceSize.width, image.sourceSize.height)
                border.color: pinchHandler.active || dragHandler.active ? "darkturquoise"
                                                                        : mouse.hovered ? "darkseagreen"
                                                                                        : "saddlebrown"
                border.width: 3 / scale
                antialiasing: true
                Component.onCompleted: {
                    x = Math.random() * root.width - width / 2
                    y = Math.random() * root.height - height / 2
                    rotation = Math.random() * 13 - 6
                }
                Image {
                    id: image
                    anchors.centerIn: parent
                    fillMode: Image.PreserveAspectFit
                    source: photoFrame.fileUrl
                    antialiasing: true
                }
使用 DragHandler 和 PinchHandler in each photo frame to handle dragging, pinch zooming and rotation:
                PinchHandler {
                    id: pinchHandler
                    minimumRotation: -360
                    maximumRotation: 360
                    minimumScale: 0.1
                    maximumScale: 10
                    grabPermissions: PointerHandler.CanTakeOverFromAnything // and never gonna give it up
                    onActiveChanged: if (active) photoFrame.z = ++flick.highestZ
                }
                DragHandler {
                    id: dragHandler
                    onActiveChanged: {
                        if (active)
                            photoFrame.z = ++flick.highestZ
                        else
                            anim.restart(centroid.velocity)
                    }
                }
由於
PinchHandler
is declared inside the Rectangle, the
PinchHandler.target
property is implicitly set so that pinch gestures manipulate the Rectangle. The rotation properties specify that the frames can be rotated to all angles, and the scale properties specify that they can be scaled between
0.1
and
10
. The pinch gesture works equally well on a touchscreen or multi-touch touchpad. Transforming the frame transforms its contents (the
圖像
).
The
DragHandler.target
property is implicitly set as well, so that you can drag a photo with one finger on a touchscreen or touchpad, or with a mouse. In the
DragHandler
's
onActiveChanged
signal handler, we raise the selected photo frame to the top by increasing the value of its
z
property (while the shared
highestZ
property holds the largest
z
value that has been used so far). When dragging ends, we begin an animation to keep it moving in the same direction for a little while, slowing down and coming to a stop. If you "fling" a photo past the edge of the surface, the surface expands to accommodate its new position. You can move around to view different parts of the surface via the
ScrollView
that contains the Repeater and all the photo frames that it populates.
Since you can drag two photos with two fingers via their DragHandlers, and you can also pinch one
PinchHandler
with two fingers, and collections of photos tend to pile on top of each other, we need to adjust
grabPermissions
so that the
PinchHandler
has priority: when the pinch gesture begins, it does not allow the DragHandlers to take over the touchpoint grabs again.
To make the example more interactive on computers without touch devices, we add the HoverHandler on which the border.color above depends, and two WheelHandlers . One allows you to hold down the Ctrl key and use the mouse wheel to twirl the photo around the mouse cursor; with the other, you can hold down the Shift key and use the mouse wheel to zoom in or out of the position under the cursor. Both of these also raise the photo in the same way that the DragHandler above does it:
                HoverHandler { id: mouse }
                WheelHandler {
                    acceptedModifiers: Qt.ControlModifier
                    property: "rotation"
                    onActiveChanged: if (active) photoFrame.z = ++flick.highestZ
                }
                WheelHandler {
                    acceptedModifiers: Qt.ShiftModifier
                    property: "scale"
                    onActiveChanged: if (active) photoFrame.z = ++flick.highestZ
                }
另請參閱 QML 應用程序 .