如何創建 RESTful API QML 客戶端的範例。
This example shows how to create a basic QML RESTful API client with an imaginary color palette service. The application uses RESTful communication with the selected server to request and send data. The REST service is provided as a QML element whose child elements wrap the individual JSON data APIs provided by the server.
要運行範例從 Qt Creator ,打開 歡迎 模式,然後選擇範例從 範例 。更多信息,見 Qt Creator:教程:構建並運行 .
The example provides the following basic functionalities:
At startup, the application presents predefined options that the color palette server can communicate with:
Once selected, the RESTful API client issues a test HTTP GET to the color API to check if the service is accessible.
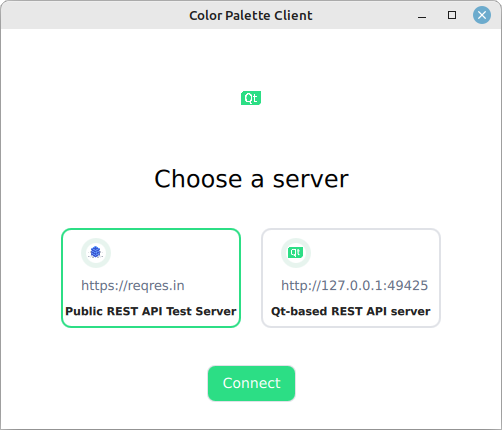
One major difference between the two predefined API options is that the
Qt-based REST API server example
is a stateful application that lets you modify the colors, whereas the
reqres.in
is a stateless API testing service. In other words, when using the
reqres.in
backend, modifying the colors has no lasting impact.
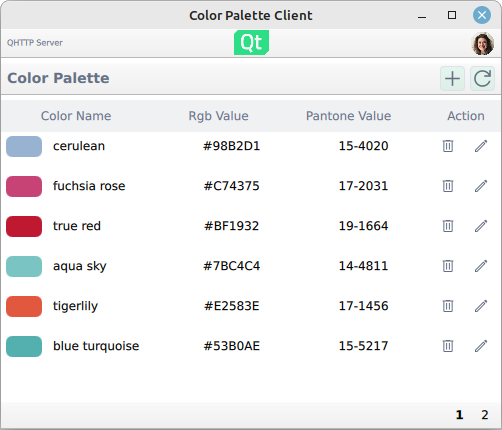
The users and colors are paginated resources on the server-side. This means that the server provides the data in chunks called pages . The UI listing reflects this pagination and views the data on pages.
Viewing the data on UI is done with standard QML views:
ListView {
    id: colorListView
    model: root.colors.data
Where the model is a list of JSON data received from the server.
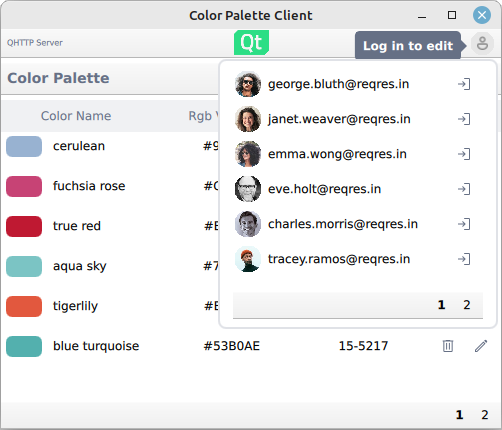
Logging in happens via the login function provided by the login popup:
userMenu.userLoginService.login({"email" : userInfo.modelData.email,
                    "password" : "apassword",
                    "id" : userInfo.modelData.id})
Under the hood, the login sends a HTTP POST request. Upon receiving a successful response, the authorization token is extracted from the response, which is then used in subsequent HTTP requests that require the token.
Editing and adding new colors is done in a popup:
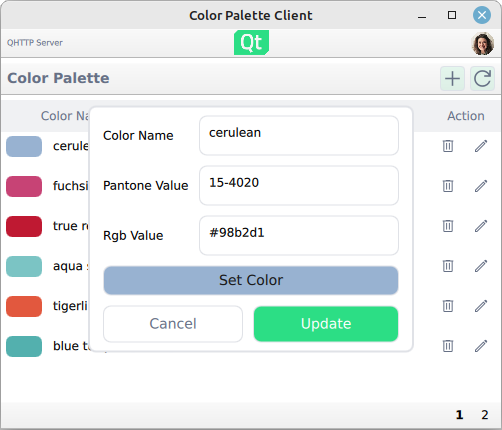
Note that uploading the color changes to the server requires that a user has logged in.
The example illustrates one way to compose a REST service from individual resource elements. In this example, the resources are the paginated
user
and
color
resources plus the login service. The resource elements are bound together by the base URL (server URL) and the shared network access manager.
The basis of the REST service is the
RestService
element whose children items compose the actual service:
RestService {
    id: paletteService
    PaginatedResource {
        id: users
        path: "users"
    }
    PaginatedResource {
        id: colors
        path: "unknown"
    }
    BasicLogin {
        id: colorLogin
        loginPath: "login"
        logoutPath: "logout"
    }
}
Upon instantiation, the
RestService
element loops its children elements and sets them up to use the same network access manager. This way the individual resources share the same access details, such as the server URL and authorization token.
The actual communication is done with a rest access manager that implements some convenience functionality to deal specifically with HTTP REST APIs and effectively deals with sending and receiving the QNetworkRequest and QNetworkReply as needed.
另請參閱 所有 Qt 範例 and Qt Quick 範例和教程 .